Shabby Blogs Background

Saturday, March 31, 2012

Iron Stamper - Two Quick Cards Today!

Tomorrow will be my last post in this series and will feature an Easter card that will knock your socks off! Be sure to check back!!

Before I get started I just want to remind you that SALE-A-BRATION ENDS TODAY AT 10:59PM PST!!! Get your orders in to me for your last chance to earn free products this year. Check out the brochure to see all the great products you can earn for free by clicking the ad on the side bar to your right. To see what is available in the Occasions Mini or the 2011-2012 Idea Book and Catalogue click on the links - remember a $60 order (pre-tax etc) earns you ONE FREE PRODUCT from the Sale-a-Bration brochure.

Okay, on to today's cards. These are SUPER simple cards featuring the Spring Fever Simply Scrappin' kit in the Occasions Mini.

What did I tell you? Super simple, right? But fun and something I'd be happy to receive. What about you?
I started with my Daffodil Delight card base. I trimmed about a 1/2" off one side and then used my Scallop Trim Border punch on that shortened side. I then backed it with a piece of Whisper White. The banner is one of the border stickers from the kit - cut down to fit. I dressed it up with some of the smallest sized Paper Daisies and a Basic Pearl Jewel accent. To colour the paper daisies (they come in white only) I simply placed them on my ink pad (I think I used Blushing Bride but I can't remember now - oops!) and used my tweezers to push them into the pad until they were saturated with colour. Allow them to dry thoroughly before trying to glue them to the card OR the pearls to them!!
A simple sentiment (this one is from my absolute favourite stamp set from Sale-a-Bration - Elementary Elegance) stamped in Chocolate chip and your card is finished.

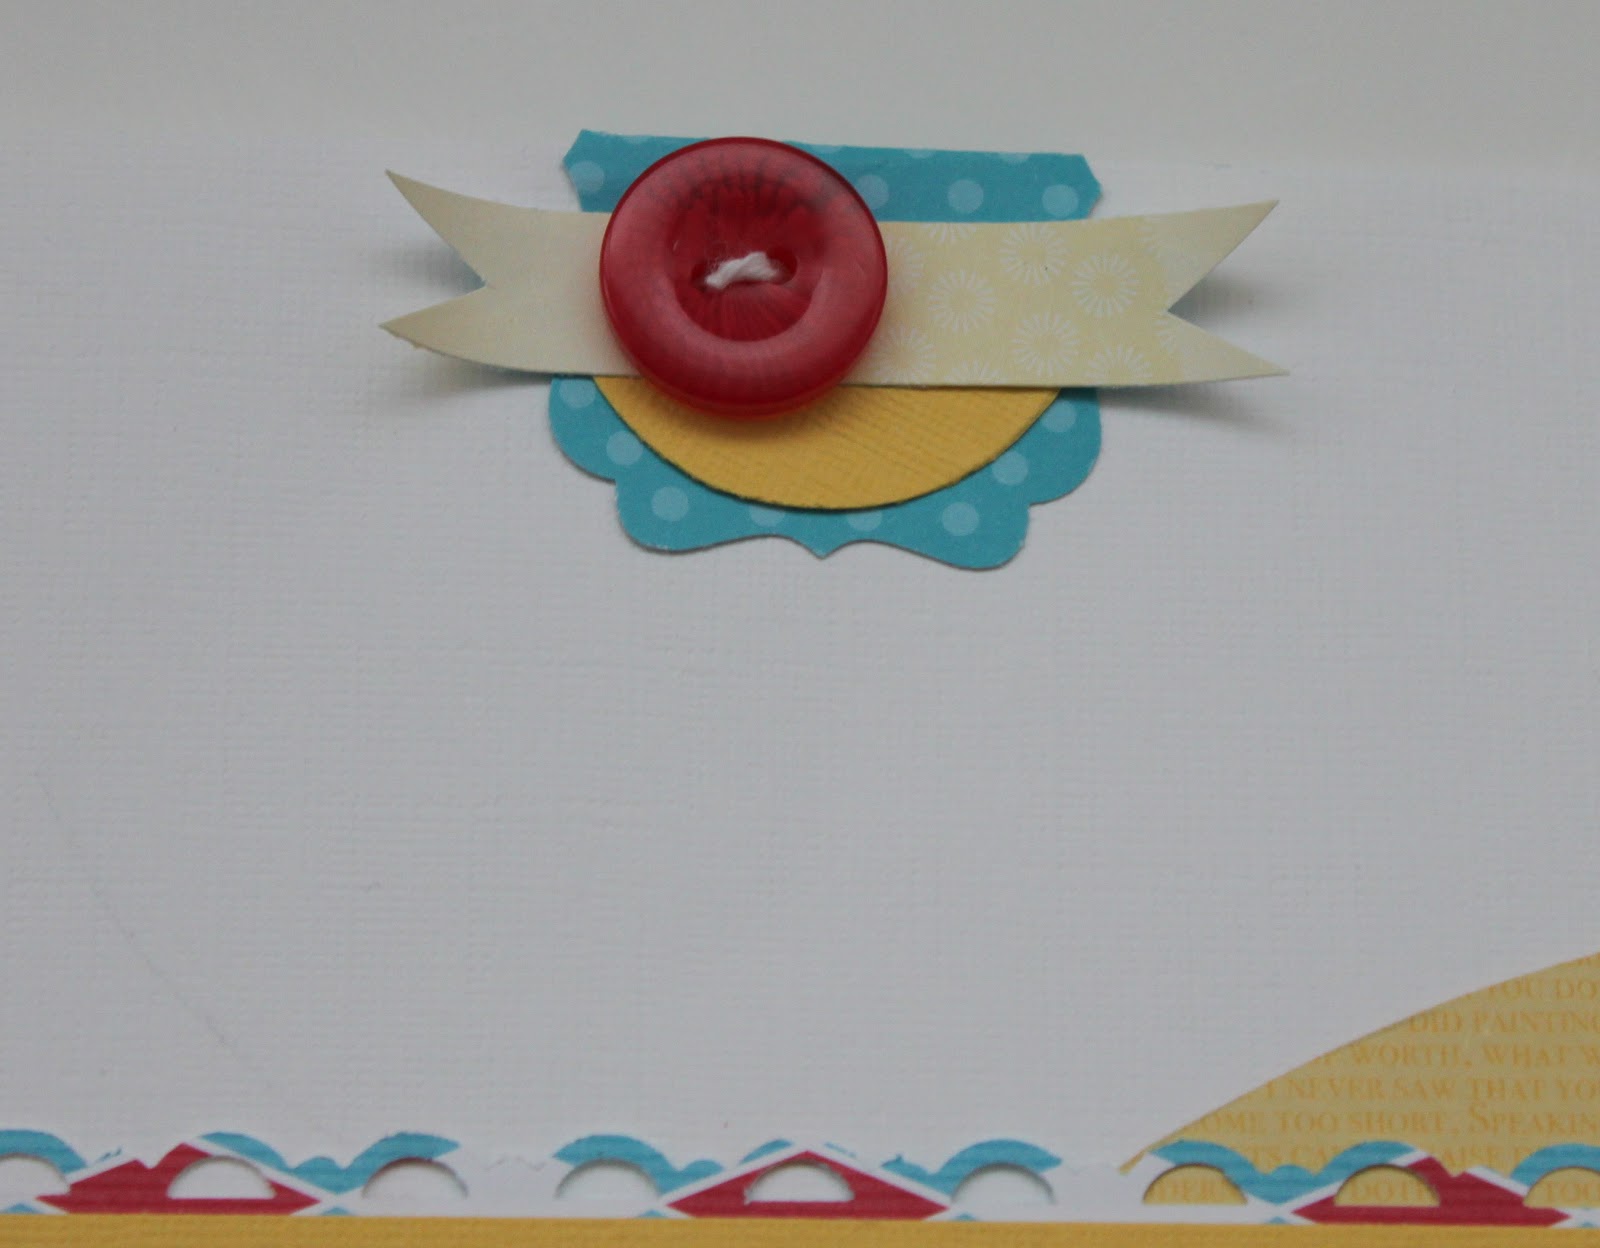
Next up, an Easter inspired card. 

I started with a base of Daffodil Delight again but this time I made a 5" square card. I layered a piece of the patterned paper from the Spring Fever Simply Scrappin' kit over top. Then a 3" circle of the Melon Mambo textured card stock from the kit which I cut out using my 3" Circle Originals Die and my Big Shot. The rest of the card is made up of various stickers from the kit simply layered on top of each other in a pleasing manner.

The middle one I popped up with Dimensionals for some added interest.

There you are. Two cards which took me probably 15 minutes to make ... total!! Sometimes it's not so much the level of detail or the amount of product you put onto the card but the act of actually sending or giving a card that matters. So having an arsenal of quick and easy cards to pull out when the occasion calls for it is priceless!

Thanks for stopping by. Remember to leave a comment on this or any of the posts in this series to be entered to win a little prize (go here to start at the beginning). Bonus entries if you become a follower or sign up to receive my newsletter. It will be winging it's way electronically tomorrow and contains a valuable coupon and information about upcoming classes. You don't want to miss it so enter your email address in the box in my side bar right now!! :)

Have a great weekend everyone!

Friday, March 30, 2012

Iron Stamper - Vellum Heart Card

Welcome to my Iron Stamper Series! If you are new to my blog and want to see what Iron Stamper is all about and look at my projects from the beginning, please start with this post.

Today I am show casing a card I ruthlessly cased from the Extraodinarily Talented Kimberly Van Deipen. She used an acrylic heart but I don't have any of the Window Sheets. What I DO have that I haven't played with nearly enough, is the 8-1/2x11" Vellum Paper, so I  made a few changes and came up with this card.

It starts with a card base of Blushing Bride onto which I layered a piece of Whisper White card stock and then a piece of Regal Rose that I'd run through my Big Shot using the Vintage Wallpaper Textured Impressions folder. To Create the heart I first stamped the image from Take It To Heart using Chocolate Chip ink onto Whisper White card stock. I cut it out using the Hearts Collection Framelits dies which I also used to cut out two larger vellum hearts. I layered them all together then surrounded the heart with Basic Pearls Jewel Accents. The packet has a variety of sizes including these small ones that are all glued together in a line. It makes it super easy to create borders like this or swirls and other flourishes.

The rest of the card came together pretty easily. I stamped the banner image from Take It To Heart in Chocolate Chip onto Daffodil Delight and then created my ribbon "tail" with a piece of Chocolate Chip 1/2" Scallop Dots ribbon and a piece of 5/8" Whisper White Organza Ribbon. To keep it all together I used a Fleurettes II Accents and Elements and a Mini Library Clip. The three mini tags were made with my Jewelry  Tag punch and Blushing Bride, Whisper White and Daffodil Delight card stock. The key image is from the Sale-a-Bration stamp set Elementary Elegance. This set will go away FOREVER tomorrow!! Place your orders of $60 to receive ONE FREE SALE-A-BRATION ITEM today!

Thanks again for tuning into this series. I really appreciate it!
Remember to leave a comment to be entered to win a prize at the end of the series and become a follower so you don't miss out on any of my fun projects. As I said above, Sale-a-Bration ends tomorrow so place your orders with me or through my on-line store today to receive FREE ITEMS with every $60 you spend. I'm not sure if I've mentioned it yet or not, but if you have ever thought about becoming a Stampin' Up! Demonstrator and sharing YOUR love of stamping and paper crafting with your friends, the Starter Kit is on sale during Sale-a-Bration. It's only $150 right now (valued at over $450 that's like getting $300 worth of FREE PRODUCT!!) and you also get a free pack of Designer Series Paper OR a free Digital Download EVERY MONTH FOR A YEAR!  That is some serious savings!! For more details click here or email me and I'll help you get started.

Have a great Friday everyone!

Thursday, March 29, 2012

Iron Stamper - You're A-Maze-ing Card

Hi there. Thanks for continuing to check out my Iron Stamper submissions. If you're new to this series and want to start at the beginning please go here.

Today I am showing you the card I made using the Maze Game piece from the Occasions Mini.
I'll admit to being totally stumped when I saw the Maze in our Iron Stamper kit. There is a coordinating stamp set which is really cute - mouse, cheese, ... let me show you.
Now, I don't own this stamp set but I really wanted the image so ... I took the catalogue, colour photocopied it, cut it out and voila! My card was born! I know, I know, this is technically cheating but ... I prefer to think of it as being resourceful!! :)


My card base is a piece of Daffodil Delight card stock. I then took a piece of Whisper White card stock, ran it through my Big Shot with the Perfect Polka Dots Textured Impressions folder and layered it onto a piece of Regal Rose card stock. The hole is made with my 2-1/2" Circle Punch. It was a bit tricky punching through all the layers but with a little effort I was able to. The Stampin' Up! punches are super durable!!
I dressed up the front of the card with layers of Chocolate Chip, Daffodil Delight and Regal Rose card stock punched using my Scallop Edge Border Punch and a piece of the 3/8" Pleated Satin Ribbon in Blushing Bride for some textural variety and a bit a sheen.
The sentiment was cut out of the photo copy I made earlier and layered onto Blushing Bride and then a Chocolate Chip banner I made using the Take It To Heart stamp set from the Occasions Mini.


Here's a close up of the Maze Game peaking through the card front. I added some Regal Rose and Daffodil Delight hearts made with my Fashionable Hearts Embosslits  Die.

Thanks again for stopping. Please leave a comment so I know you were here and to get you into the running for a little prize I've decided to hand out at the end of this series. If you liked what you saw and don't want to miss the rest of the series please become a follower!
I also wanted to remind you that time is rapidly running out to get FREE SALE-A-BRATION ITEMS WITH PURCHASES OF $60.  Sale-a-Bration ends on Saturday March 31st so there are only a few days left!! 
And finally, sign up to receive my newsletter by entering your email address in the box in the side bar and you will receive a FREE COUPON with April's newsletter.

Wednesday, March 28, 2012

Iron Stamper - Class-Style Card

Welcome back! Are you enjoying this series? Please leave a comment and at the end of the series I will draw a name and send them a little goody bag!

Today we are taking a look at a Class-Style Card. This is the type of card that had more layers and uses more techniques so it generally doesn't get done during workshops purely due to time constraints. This one takes the general premise of my 5-Minute Card from yesterday and adds to it. 

As you can see, I've started with the Hello, Doily stamp on the base piece of Whisper White card stock. This time though I've stamped it in Lucky Limeade. Then I created the embellishments. 
First up is the layered square. I started with a piece of Daffodil Delight card stock which I stamped with an image from Mixed Bunch in both Daffodil Delight and Blushing Bride. I layered it onto a piece of Chocolate Chip and then a piece of Regal Rose. I wrapped the whole thing with the 5/8" Whisper White Organza Ribbon, tied a knot, added some Basic Pearls and a Large Pearl and called it done!

Here's a close up of the pearl accents, ribbon etc.

Once I attached the square embellishment I knew I wanted to add another embellishment into the middle of the doily image. I punched out a Blossom, inked the edges with Chocolate Chip then layered on a Fleurettes II Accents and Elements and a stamped Lucky Limeade circle (image taken from Mixed Bunch).

There you go. Hopefully I've shown you how you can take a simple card and jazz it up to make it whatever you want it to be.

Reminders: this is the FINAL WEEK to earn FREE Sale-A-Bration products with every order. Purchases of $60 get you one free item!
Sign up for my newsletter in the side bar to receive a FREE COUPON with April's newsletter.
Leave a comment to win a prize at the end of this series - become a follower so you don't miss out on any of the series!

Tuesday, March 27, 2012

Iron Stamper - 5 Minute Card

Now we've covered the big projects, it's time to turn our attention to the cards I made to fill my little suitcase card keeper. First up is the 5-minute card.
Can I just take a minute to gush about this stamp? It's the Hello, Doily stamp and every time I use it I fall back in love with it. I really hope it doesn't get discontinued at the end of May!!

Anyway, back to the card. I started with a base of Chocolate Chip card stock then added a layer of Blushing Bride card stock that I'd run through my Bog Shot with the Stripes Textured Impressions folder. The doily image was stamped in Blushing Bride onto Whisper White card stock - slightly off the edge. The sentiment is from the Sale-A-Bration Elementary Elegance stamp set (LAST WEEK TO GET FREE PRODUCTS LIKE THIS WITH YOUR PURCHASES!) and is stamped in Chocolate Chip.

Along the bottom of the image I layered a piece of 3/8" Pleated Satin Ribbon in Blushing Bride over a piece of 5/8" Whisper White Organza Ribbon. These are wrapped slightly around the edge of the Blushing Bride layer and then the whole thing is popped up with Dimensionals. 

Just one two last notes: after I took this picture I decided to add a Large Pearl to the centre of the doily image. Also, the inside of the card has a piece of Blushing Bride card stock stamped with an image from Delicate Doilies (also in Blushing Bride - for a barely there subtle look).

Thanks for stopping by! Remember to follow my blog to get all the upcoming posts in this series and if you're interested in my monthly newsletter full of news from Stampin' Up!, my classes and fun tips, please add your email address into the box on my side bar. April's newsletter will contain a valuable coupon that you won't want to miss!!

See  you tomorrow!!

Monday, March 26, 2012

Iron Stamper - Progressive Layout

Welcome back! Next up in my Iron Stamper series is my layout. This is called a Progressive layout as you start with a small sized layout (in my case an 8x8 layout) which you mount onto increasingly larger sizes until you finally have a 12x12 layout.

Here's the finished layout.
Isn't she gorgeous? That's my youngest, Christine, taken last Easter on an egg hunt. Just love the close up of her chocolate covered face!!

Here is my 8x8 page. 
I started with an 8x8 piece of Blushing Bride card stock to which I added a strip of one of the patterned papers from the Spring Fever Simply Scrappin' kit and a punched border strip of Chocolate Chip. The photo is mounted onto a piece of 5x7 Whisper White card stock. Across the bottom I stamped and embossed my favourite image from the Mixed Bunch stamp set. I used my Jayne's Type Alphabet stamps for the 'C' which I mounted behind the 1-1/2x2" Beveled Window Pane (also in my Iron Stamper kit but I forgot to mention it before - oops!) I threaded the 5/8" Whisper White Organza Ribbon through the Window Pane and, to help it pop, mounted it onto a Lucky Limeade Blossom over a sticker from the Simply Scrappin' kit.


Next I created this 8-1/2x11" page.


I used my Hello Doily stamp to stamp a Blushing Bride doily slightly off the page and embellished it with a Large Pearl. I then mounted this piece of Whisper White card stock onto an 8-1/2x11" piece of Chocolate Chip card stock. The title took me a bit of time to figure out. I started with my Alphabet Soup On Board letters to which I adhered some Daffodil Delight card stock. I inked the edges in Chocolate Chip but they still looked flat so I stamped them with the Mixed Bunch stamp that I'd used on the 8x8 page - in tone on tone Daffodil Delight. 


The little picture of Christine was mounted onto Chocolate Chip card stock and I used Dimensionals to pop it off the page even more. Behind the picture is a cluster of stickers from the Simply Scrappin' kit.

And last but not least, my 12x12 base layer. I started with the vertical strip of patterned paper from the Simply Scrappin' kit then added a strip of Daffodil Delight card stock that I'd edged with my Scallop Trim Border punch. On top of that is a border sticker from the Simply Scrappin' kit and then finally 3 more pictures of my cutey mounted onto Melon Mambo card stock (from the SS kit).  

Across the top of the page I put some stickers from the SS kit and finally, in the corner another stamped, embossed and punched out Blossom with a Fluerettes II Accent and Embellishment and a Large Pearl layered on top. This whole flower sits on top of a tiny piece of 3/8" Blushing Bride Pleated Ribbon.

Here's a look at it coming together.
The starting 8x8 page.

Added onto the 8-1/2x11 page.

And finally, here's another look at the finished 12x12 page. 

I will freely admit that this page took me awhile with lots of trial and error but the final result is (IMHO) stunning! I love all the layers! I would never have incorporated so many if I hadn't been purposefully making this a progressive page but I think I will have to use this approach again.

Hope you enjoyed it. Stay tuned for my cards!


Sunday, March 25, 2012

Iron Stamper - Card Keeper

As promised, here is the first of my Iron Stamper posts.
First up, my 3-D item - the Birthday Card Keeper.

I started with this cute little $2 suitcase from Dollarama.

I cut, inked and pasted card stock to both the inside and outside ... 


to eventually end up with this.

In my entire suite of products I decided to also feature the Spring Fever Simply Scrappin' kit from the Occasions Mini so anytime you see any patterned paper or colours of card stock not in the original Iron Stamper Packet, it's from this kit. 

For the top of the lid I used my Labels Framelits Dies to create this layered frame - which is the perfect place to identify all those that might receive a card from you! The stamps are all from the Family Reunion stamp set - I love how this set covers everyone in your family!

To dress up the lid I added a couple of flowers.  
This one starts with the largest size of Paper Daisy which I had spritzed with Chocolate Chip ink using my Colour Spritzer Tool. On top of that is a stamped, embossed and punched out Regal Rose flower made by using the Mixed Bunch stamp set, white embossing powder and the Blossom punch. Then I added another, smaller, Paper Daisy (also spritzed), a stamped 3/4" circle of Lucky Limeade and a Large Pearl. As a final step I sprayed the entire flower lightly with alcohol spray which made the Chocolate Chip on the top Paper Daisy run to create a cool water colour look. When that top Paper Daisy was wet I scrunched it up and didn't un-scrunch it until it was dry! Oh, and the leaves were made by stamping another image from Mixed Bunch with Lucky Limeade, punching it out with the Blossom punch and then cutting the flower into thirds! 

The other flower on the lid is a simpler version of the one above only this time I didn't spray the whole thing with Alcohol ink.

Here's another look at the front again.
Around the handles (mostly to hide the horrible cut job!) I used more Blossom punched flowers cut to fit plus some of the DSP from the Spring Fever kit. I finished it off by tying a bow with the Whisper White 5/8" Taffeta Ribbon. 

Here is a picture of it open and filled with cards.

Thanks for checking me out! If you enjoy what you see please do leave a comment and make sure you're a follower as I've got a whole week devoted to all the Iron Stamper items you see in this picture above. I wouldn't want you to miss any of them!


Saturday, March 24, 2012

Iron Stamper Competition

As a Stampin' Up! Demonstrator you are automatically made a member of various Up-line groups - made up of your sponsor and her other demos, her sponsor and her other demos, etc, etc, etc. We meet regularly to swap cards, ideas, learn new techniques, discuss business ideas and chat about life. It's a really nice way to have a night out without feeling like you're not doing something productive!

Anyway, at my Sea to Sky Stampers group meeting in January I was chosen to compete in a competition called Iron Stamper. What is that you ask? Here's the low down ...


What is an Iron Stamper? If you accept the challenge to be an 'Iron Stamper', you will be given a pakage of supplies that you will use to create a suite of products. Each project must use all of the products in your kit in some way, and you must create at least one of each of the following items:
- One 5 minute 'quick' card that would be approriate for a workshop setting (easy, not too many layers, but high 'wow' factor
- One class-style card - can be as difficult as you want, but should be several layers and/or techniques used. Any size is fine except for 3" or mini cards.
- One 3-D item. You can make paper boxes, paper 'photo albums', fantasy boxes, etc., or decorate an item from a dollar store using our products.
- One Scrapbook Layout - progressive pages, 8" square, 8-1/2x11", 12" square, but please no 6" or smaller layouts.
You may choose to use other Stampin' Up! products on your projects (and will likely need to do so.)
RULES:
- You have 2 months to create these projects.
- They are due in the meeting location 30 minutes before the start of then next official meeting.
- YOU MUST USE ALL SU!, CURRENT PRODUCTS! (with the exception of the items you are altering)
- Do not post any projects on your website or BLOG until after the competition (some sneaks are okay as teasers)

Without further ado here is a picture of the supplies we were given and what I made with them. I'll have a string of posts over the next week or so showing them in more detail and talking about my processes - hope you join me for those!
This is what we were given - 12x12 Regal Rose card stock, 8-1/2x11 card stock in Daffodil Delight, Blushing Bride, Chocolate Chip and Whisper White, some Paper Daisies Accents, some Fluerettes II Accents and Elements, a Maze Game, some 3/8" Pleated Satin Ribbon in Blushing Bride, some Whisper White 5/8" Organza Ribbon, some Large Pearl Basic Jewels and some Basic Pearls Jewel Accents.

My first stop was Dollarama to see what I could find to alter - at $2, the price was most definitely right for this little suitcase. 


I turned it into this little birthday card keeper.


 Next up is my layout. I went for a Progressive Layout (all details will be in a future post!!) 


My Class-style card #1 is this one with a woven Easter basket on the front.


With this being my Class-style card #2 (a more complex version of the 5-minute card coming up.) 

My 5-minute card. 

And if you are wondering how I used that Maze Game .... 

Well, there you have it. I padded my display with more cards in my little suitcase - to show it as a card keeper! As I said earlier, I'll be sharing more details on these projects over the coming days so I hope you check back!

In case you're wondering, no, I did not win. sigh.


Friday, March 23, 2012

Sweet Shop Birthday card

Today is my youngest daughter, Christine's 3rd birthday. She is such a darling little scamp so I decided to make a fun card for her. I think it was using the Big Top Birthday DSP last week that started an obsession with making pin wheels. For whatever reason, I can't get them out of my mind and keep coming across them in my (too frequent) BLOG surfing sessions!  

What do you think? Fun, huh?

I started with a piece of Calypso Coral card stock then layered a piece of Pool Party card stock that I'd run through my Perfect Polka Dots Textured Impressions folder on my Big Shot. On top of that is a piece of Whisper White card stock stamped with the Sweet Cake stamp set and dressed up with my fun pinwheels (3 of them in honour of her 3rd birthday!)

The pinwheels themselves are made out of pieces of the Sweet Shop DSP and are held in place with a brad from the Sweet Shop Jelly Bean brads.

Here's a fun tip to create some added interest on your cards. When you have an image like this one where the sentiment is added separately from the main image, stamp the sentiment onto a different piece of card stock and then use Dimensionals to pop it off the first stamped image.

Well, I've got a cake to finish and a house to clean for a family celebration later this weekend so I'd better run! One last thing though... the products featured on this card today (Sweet Shop Suite of products) are in the Occasions Mini Catalogue and will only be available until April 30th. Get them now!! Stampin' Up! has changed their catalogue schedule so there will not be a Summer Mini this year. Instead we will be seeing the new 2012-2013 Idea Book and Catalogue as of June 1st (I'll get a sneak peak starting May 1st). As a teaser they are releasing a look at their Summer Smooches Suite starting April 1st. Take a look ...
To see a PDF flyer about the promotion, click on the link. Can you say YUMMY?!

Saturday, March 17, 2012

Something Green for you

This morning - in anticipation of my Sale-a-Bration Celebration - I whipped up a little card. It's not overtly "St Patrick's-y" (mostly because I do not own any shamrock stamps!) but it is green!

 
I am filing this under a new category of 'Quick Cards'. It literally took me 5 minutes to put together! I don't know about you, but I love a card that I can whip up when I need it so I plan to share MY quick cards with you in the future. Spending hours on a card is great (and TONS of fun) if you have the time or are clever enough to plan ahead but I am usually a last minute card maker kind of gal. Look for Quick Cards to become a regular feature. Hope you like them!


Products used:
Whisper white and Pear Pizzazz card stock
Elementary Elegance stamp set (from Sale-a-Bration brochure)
3/8" Pleated Satin Ribbon in Pear Pizzazz
Pear Pizzazz and Chocolate Chip Classic Stampin' Pads


Wednesday, March 14, 2012

Project 12 - February 2012

Time for another Project 12 layout. I've decided to feature a different paper collection with each month/layout so this month I used Big Top Birthday. If you click the link you'll see how fun this paper is!

Here's my layout.


I used this sketch from the February 2012 PageMaps sketches.

In the interest of making this a quick post I'm not going to go into great detail about my process but here are some close up shots of the details. Hope you like them!

Left side

Right side

Stamping + paper covered On Board hearts + a button = cute collage!

On board letters that are inked and then covered in Crystal Effects.

Some stickers from the Big Top Birthday Quick Accents kit plus a couple punched circles and an On Board banner.

All that white card stock needed a little something something ... if you know what I mean. Love these little embellishment clusters!

More stamping with my embellishments.


Products used:
Big Top Birthday DSP and Big Top Birthday Quick Accents Kit
12x12 Textured Card Stock in Whisper White from the Neutrals Collection
12x12 Textured Card Stock in Daffodil Delight from the Brights Collection
Real Red smooth card stock
Classic Stampin Pad in Tempting Turquoise
Patterned Party stamp set
On Board Alphabet Soup and Merry Medley
Crystal Effects
1" and 21/2" Circle punches
Decorative Label Punch
Heart-to-Heart Punch
Scallop Trim Border Punch
Designer Buttons - Brights Collection

Thanks for stopping by. Don't forget about my Sale-a-Bration Celebration on Saturday. All the information is here - come by for some inspiration and the chance to win great prizes! I might even have some items for sale - if I get organized in time!!